Keyboard
I was using a standard Logitech wired keyboard (windows layout) for a while with my Mac Mini when I got to thinking of getting one with a Mac Keyboard layout. I wanted a wireless (to reduce the clutter of wires on my desk) full sized Mac keyboard. That ruled out Apple's own options like the Apple Keyboard with Numeric Keypad and the Apple Bluetooth Wireless Keyboard (which doesn't have a numeric keypad).
After reading reviews, I chose the Logitech Wireless Solar Keyboard K750 for Mac.
It fulfilled all my criteria plus it could automatically recharge itself using solar technology which even works with ambient room light. Excellent! Unfortunately, the local distributor in Singapore does not sell it here so I had to import it from the US.
It came in a no frills packaging :

 It is so eco-friendly that the Getting Started instructions are printed directly on the packaging! A very thin keyboard with flat buttons (similar to Apple's bluetooth keyboard) but with a strip of solar cells across the keyboard ( see the dark colour strip on top of the keyboard).
As with most mid to high range Logitech Mice and Keyboards, it comes with a Logitech Unifying receiver as shown below.
 Plug it into any available USB port on the Mac Mini in order to communicate wirelessly to the keyboard. One Unifying receiver is all that's needed to communicate with multiple Logitech devices that fall under the Unifying umbrella, saving you the need to use up multiple USB ports. It also means you have more "incentive" to stick with the Logitech family.
Flipping the keyboard around, it is endowed with 2 keyboard "legs" to raise the top of the keyboard such that it slants towards you when you place it on a flat surface. Below pic shows you one leg extended.
 How it looks like together with the Mac Mini:
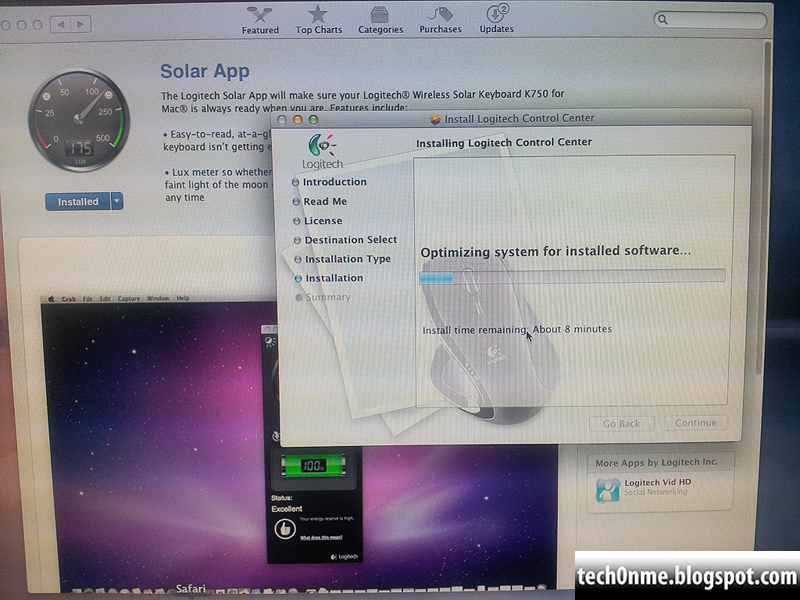
 Now all you need to do is to download the Logitech Control Center for Mac from the Logitech website and the Solar App to show on screen the power status of the keyboard.
 The Solar App can be downloaded free directly from the App store (New feature of OS Lion is the integration with the Apple App Store).
Price: US$59.99 (approx. S$76) before shipping. Shipping to Singapore via 3rd party shipper (in this case, Vpost) costs about S$20 to S$30
Where to get it: Logitech Wireless Solar Keyboard - Mac
Verdict: For me, my only initial gripe is that the flat keys took some getting used to as I was expecting a keyboard with full sized keys which I'm more used to. The keyboard is very responsive and the solar recharging works like a charm (aka plug and forget) which is a huge plus for me not having to worry about getting batteries to replace. My personal rating is 4.5 out of 5 stars.
Mouse
Yes, I suppose I could have stuck with Apple's Magic Mouse. White, Slick and endowed with Multi-touch but I was looking for a wireless mouse with at least 2 physical buttons(to right-click for real) which could be used on multiple types of surfaces and could be recharged easily. Enter the Logitech Wireless Performance Mouse MX. It is a right-handed Mouse that is compatible with a PC and Mac, employs "Darkfield" tracking which enables better tracking on difficult surfaces like glass and can be recharged easily.
The box looks nifty:


Practical Tip #1: As always, try to buy during a sale to get these cheaper. Black Friday and Cyber-Monday are always good times to go online shopping.
Practical Tips for Vpost: If you reside in Singapore and thinking of using Vpost to ship these items from the US, here are some money saving tips:
Hope this article sheds some light for those thinking about adding such peripherals to your Mac devices.
All opinions / views expressed on my blog are entirely my own and provided for free. If you do like the posts and find them useful, then perhaps you can click on an Ad on this blog or click on any of the item links listed on this blog to purchase the items from the respective store (like Amazon) to show your support. I don't make much (if anything) from these but it gives me additional encouragement to continue sharing my experiences. Thanks for reading!
After reading reviews, I chose the Logitech Wireless Solar Keyboard K750 for Mac.
It fulfilled all my criteria plus it could automatically recharge itself using solar technology which even works with ambient room light. Excellent! Unfortunately, the local distributor in Singapore does not sell it here so I had to import it from the US.
It came in a no frills packaging :

Opening up the package to reveal the contents:

As with most mid to high range Logitech Mice and Keyboards, it comes with a Logitech Unifying receiver as shown below.

Flipping the keyboard around, it is endowed with 2 keyboard "legs" to raise the top of the keyboard such that it slants towards you when you place it on a flat surface. Below pic shows you one leg extended.


Price: US$59.99 (approx. S$76) before shipping. Shipping to Singapore via 3rd party shipper (in this case, Vpost) costs about S$20 to S$30
Where to get it: Logitech Wireless Solar Keyboard - Mac
Verdict: For me, my only initial gripe is that the flat keys took some getting used to as I was expecting a keyboard with full sized keys which I'm more used to. The keyboard is very responsive and the solar recharging works like a charm (aka plug and forget) which is a huge plus for me not having to worry about getting batteries to replace. My personal rating is 4.5 out of 5 stars.
Mouse
Yes, I suppose I could have stuck with Apple's Magic Mouse. White, Slick and endowed with Multi-touch but I was looking for a wireless mouse with at least 2 physical buttons(to right-click for real) which could be used on multiple types of surfaces and could be recharged easily. Enter the Logitech Wireless Performance Mouse MX. It is a right-handed Mouse that is compatible with a PC and Mac, employs "Darkfield" tracking which enables better tracking on difficult surfaces like glass and can be recharged easily.
The box looks nifty:

Opening the cover, you see the mouse and the Unifying USB wireless receiver encased in plastic:

The fact that it is also under the Unifying umbrella means I am able to reuse the same receiver that I used for my Wireless Keyboard mentioned above. What does the box contain? Right below:

The mouse and wireless receiver are on the top left corner, the power adapter plug ( US pin layout but world voltage 120 to 240 V) on the top right corner. On the bottom left, you have the quick start guide and software CDs and on the bottom right, you have a USB extender cable and the USB charging cable. The package also includes a pouch much like a pencil case to house the USB cables and power plug.
To start using the mouse, flip it over like so:

Next, pull the arrow shaped piece of paper labelled ("Pull") out. The rechargeable batteries are now in contact with the battery terminals and you can start charging it for first time use.
Recharging the mouse:
Notice that at the front of the mouse, there is a mini USB port. This is where one end of the USB charging cable goes to. The other end can be connected to 1 USB port on the Mac Mini or to the Power Plug Adapter which can be plugged into an electrical socket to charge.

If you charge it through the Mac Mini, it resembles a wired mouse (see below) and the mouse can continue to be used. If the 3 green lights stop blinking, it means the mouse is fully charged.

I won't go into details on how you install the Logitech Control Center which is pretty straight forward, For that you can follow the Getting Started Guide that comes with the mouse.
Darkfield Tracking: Does it really work?
I do not have a glass table at home to try on, so what I did was I tried this out by using the shiny LCD screen of my Ipad 2 as a mouse pad. The following video might give you an idea of how effective Darkfield is:
Price: Yes you can get it locally in Singapore but it costs a whopping S$185 (US$138) !! Holy Markups, Batman! If you are willing to forego warranty, you can get it for US$69.99 (approx. S$94) before shipping. I got mine at US$49.99 (approx S$67) before shipping during the last Black Friday sale on Amazon. Shipping to Singapore would be about S$20 to S$30 via a 3rd party shipper like Vpost
Verdict: For me, my main gripe as experienced by some reviewers on Amazon is that the battery doesn't last very long (maybe at most a week) if the mouse is left on all day even when not in use. Optionally, You can turn off the mouse (switch is on the bottom) to extend the battery life. Performance wise, the ergonomic shape of the mouse means the curves fit my right hand nicely and the mouse has some weight to it which can be reassuring to some people but a bother for others who prefer a lighter mouse. The buttons are very responsive and the cursor movement is very sensitive. The scroll wheel is of the "loose" kind i.e it can be spun quite easily [Updated 30 Jan 2012: My Bad, I didn't realise the button just below the scroll wheel allows you to toggle between a "loose" scroll wheel (where you can actually just spin the scroll wheel and let it go) or a "tight" scroll with slower but more controlled movement, Brilliant on Logitech's part to allow people to configure their preference ]. The recharging feature using the USB cable was a brilliant master stroke on Logitech's part as it means you still can use the mouse (like a wired one) while it is being charged. My personal rating is 4 out of 5 stars. There's still much to like about the mouse but it would have been better if the battery life was much longer. I guess that's the trade-off for better tracking using Darkfield Technology which is probably what's draining the battery so fast. Hope Logitech improves on this in successive models.
Practical Tip #1: As always, try to buy during a sale to get these cheaper. Black Friday and Cyber-Monday are always good times to go online shopping.
Practical Tips for Vpost: If you reside in Singapore and thinking of using Vpost to ship these items from the US, here are some money saving tips:
- If you order items in multiple shipments and they reach to Vpost's USA address at about the same time, Vpost only charges you the Base charge (S$13.40) of the first shipment. The 2nd shipment and above are not charged.
- Please remember that if the total cost of the item(s) in one shipment plus any insurance and shipping charges (vpost charges included) exceeds S$400, you have to pay an additional 7% GST on that total amount.
- If it is the first time you are shipping using vpost, try to make use of the credit card promotions that may give you up to 20% off. For future shipments, if the vpost shipping cost is S$40 and above, there is also a 10% discount for some of the credit cards too. Check the bottom of this page for Credit Card Promotions for Vpost
Hope this article sheds some light for those thinking about adding such peripherals to your Mac devices.
All opinions / views expressed on my blog are entirely my own and provided for free. If you do like the posts and find them useful, then perhaps you can click on an Ad on this blog or click on any of the item links listed on this blog to purchase the items from the respective store (like Amazon) to show your support. I don't make much (if anything) from these but it gives me additional encouragement to continue sharing my experiences. Thanks for reading!


